blog · 3 August 2026
Your first micro:bit program in the browser
Place a BBC micro:bit V1, flash a five-line MicroPython program, click the on-canvas buttons, and learn the Run and Restart semantics that make classroom demos predictable.
The fastest way to teach MicroPython is to skip the box of tangled USB cables entirely. de:volt's BBC micro:bit V1 runs the same MicroPython build as the physical board, so the code from any micro:bit lesson runs unmodified, and the board on the canvas responds like the one in the kit drawer.
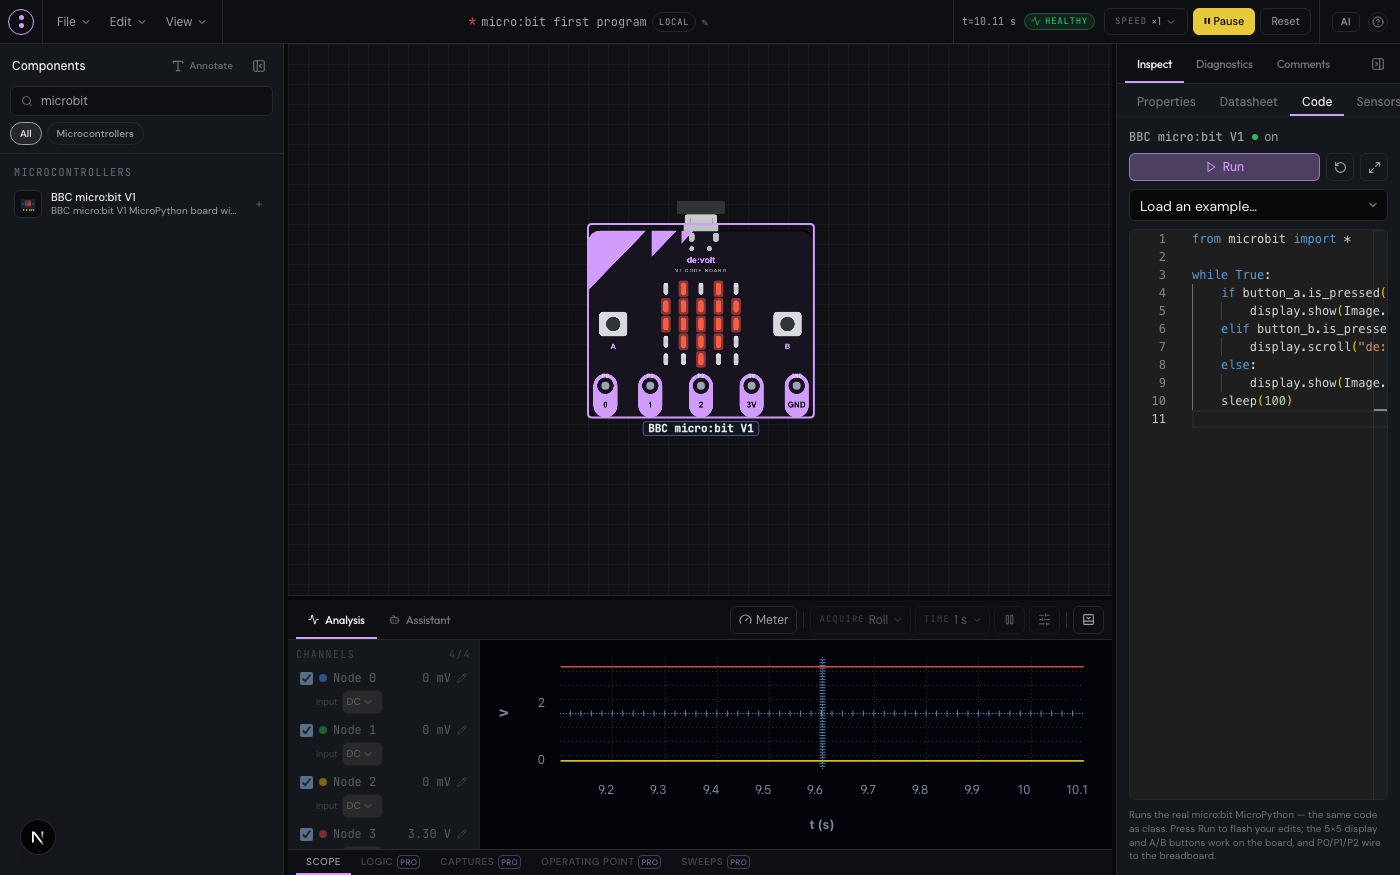
Place and flash
- Open sim.devoltapp.com as a guest. Search the palette for "microbit" and click the + to place a BBC micro:bit V1. It arrives powered, USB plugged, matrix dark.
- Select the board and open the Code tab in the Inspector.
- Replace the editor contents with the classic:
from microbit import *

while True:
    if button_a.is_pressed():
        display.show(Image.SMILE)
    elif button_b.is_pressed():
        display.scroll("de:volt")
    else:
        display.show(Image.HEART)
sleep(100)- Press Run (Ctrl or Cmd+Enter also works). The heart appears on the board's LED matrix, mirrored live on the canvas.
Now click and hold the A button on the board art itself. The smile appears for as long as you hold it, because the click is a real momentary press injected into the running program, not an animation. Button B scrolls text. This is the moment the simulator stops being a diagram: your program is genuinely running, and the board is genuinely listening.
Run, Restart, and the unsaved chip
Three semantics worth teaching explicitly, because they make live demos predictable:
- Typing never reflashes the board. Your edits are a draft until you press Run, and an amber Unsaved chip reminds you when the draft differs from what the board is running.
- Run flashes the current editor contents and stores the program with the circuit. Reopen the project later and the board boots the stored program on its own.
- Restart reruns the last flashed program, ignoring draft edits. Mid-lesson, that means you can experiment freely in the editor and always get back to the known-good version with one click.
The Load an example… menu has working starters (show a heart, scroll text, buttons, tilt), and loading one over edited code asks before overwriting. If the editor feels cramped next to the canvas, the pop-out button floats it as a resizable window.
What the board can do without any wiring
The whole sensor suite works from code: accelerometer.current_gesture(), compass.heading(), temperature(), and display.read_light_level(). Open the Sensors tab next to Code and you can drive them by hand: drag the 3D board to tilt it, fire a shake gesture, set the light level. The gesture chips hold their pose the way a real tilted board would, so while accelerometer.is_gesture("face down"): behaves.
Two honest notes from the compatibility page: the compass never needs calibrating in the simulator (a deliberate kindness; real hardware will ask), and display animation pacing runs a touch slow, so timing-critical lesson checks should allow some slack. The full list of faithful quirks is at docs.devoltapp.com/parts/microbit.
When you want pins
The five big edge pads (P0, P1, P2, 3V, GND) wire straight to a breadboard, and pin0.write_digital(1) drives a real simulated net. That deserves its own post, and gets one soon: an external LED, the 3.3 V rules, and the breakout that adds six more pins when the project outgrows three.
If you teach, note that the identical board and editor sit inside Learn lessons too, where objectives can check what the program actually did to the circuit. Start at learn.devoltapp.com or just open the simulator and place a board; the heart takes ninety seconds.